Installation
Tip
Neos is built on top of the Flow framework. If you run into technical problems, keep in mind to check the Flow documentation for possible hints as well.
Requirements
Neos has at least the same system requirements as Flow. You can find them in the Flow Requirements Documentation.
The most important requirements are:
A Webserver (Apache and Nginx are preferred but others work as well)
A Database (MySQL > 5.7.7, MariaDB > 10.2.2 and PostgreSQL > 9.4 are preferred but any Database supported by Doctrine DBAL should work as well).
PHP >= 7.1.0 (make sure the PHP CLI has the same version)
PHP modules mbstring, tokenizer and pdo_mysql
PHP functions exec(), shell_exec(), escapeshellcmd() and escapeshellarg()
It is recommended to install one of the PHP modules imagick or gmagick
Fundamental Installation
First you need to install the dependency manager Composer (if you don’t have it already):
curl -sS https://getcomposer.org/installer | phpBy issuing this command Composer will get downloaded as composer.phar to your working directory. If you like to have composer installed globally, you can simply move it to a directory within your $PATH environment.
mv composer.phar /usr/local/bin/composer
Note
If you are on Windows please refer to the offical documentation on how to install Composer on Windows
Go to your htdocs directory and create a new project based on the Neos base distribution:
cd /your/htdocs/
php /path/to/composer.phar create-project neos/neos-base-distribution Neos
Composer will take care of downloading all dependencies for running your Neos installation to the directory
Neos. You can safely delete the vcs files by answering ‘Y’ to the question ‘Do you want to remove the existing VCS (.git, .svn..) history? [Y,n]?’.Next set up a virtual domain/host in your webserver configuration
Apache configuration
Set up a virtual host inside your Apache configuration. Set the
DocumentRootto theWebdirectory inside the Neos installation. Set the directiveAllowOverridetoÀLLto allow access to .htaccessNameVirtualHost *:80 # if needed <VirtualHost *:80> DocumentRoot "/your/htdocs/Neos/Web/" # enable the following line for production context #SetEnv FLOW_CONTEXT Production ServerName neos.demo </VirtualHost> <Directory /your/htdocs/Neos/Web> AllowOverride All </Directory>
Make sure that the
mod_rewritemodule is loaded and restart apache. For further information on how to set up a virtual host with apache please refer to the Apache Virtual Host documentation.nginx configuration
For further information on how to set up a virtual domain with nginx please refer to the nginx documentation.
Add an entry to /etc/hosts to make your virtual host reachable:
127.0.0.1 neos.demo
Make sure to use the same name you defined in
ServerNamein the virtual host configuration above.Set file permissions as needed so that the installation is read- and writeable by the webserver’s user and group:
sudo ./flow core:setfilepermissions john www-data www-data
Replace john with your current username and www-data with the webserver’s user and group.
For detailed instructions on setting the needed permissions see Flow File Permissions
Note
Setting file permissions is not necessary and not possible on Windows machines. For Apache to be able to create symlinks, you need to use Windows Vista (or newer) and Apache needs to be started with Administrator privileges.
Now go to http://neos.demo/setup and follow the on-screen instructions.
The Neos Setup Tool
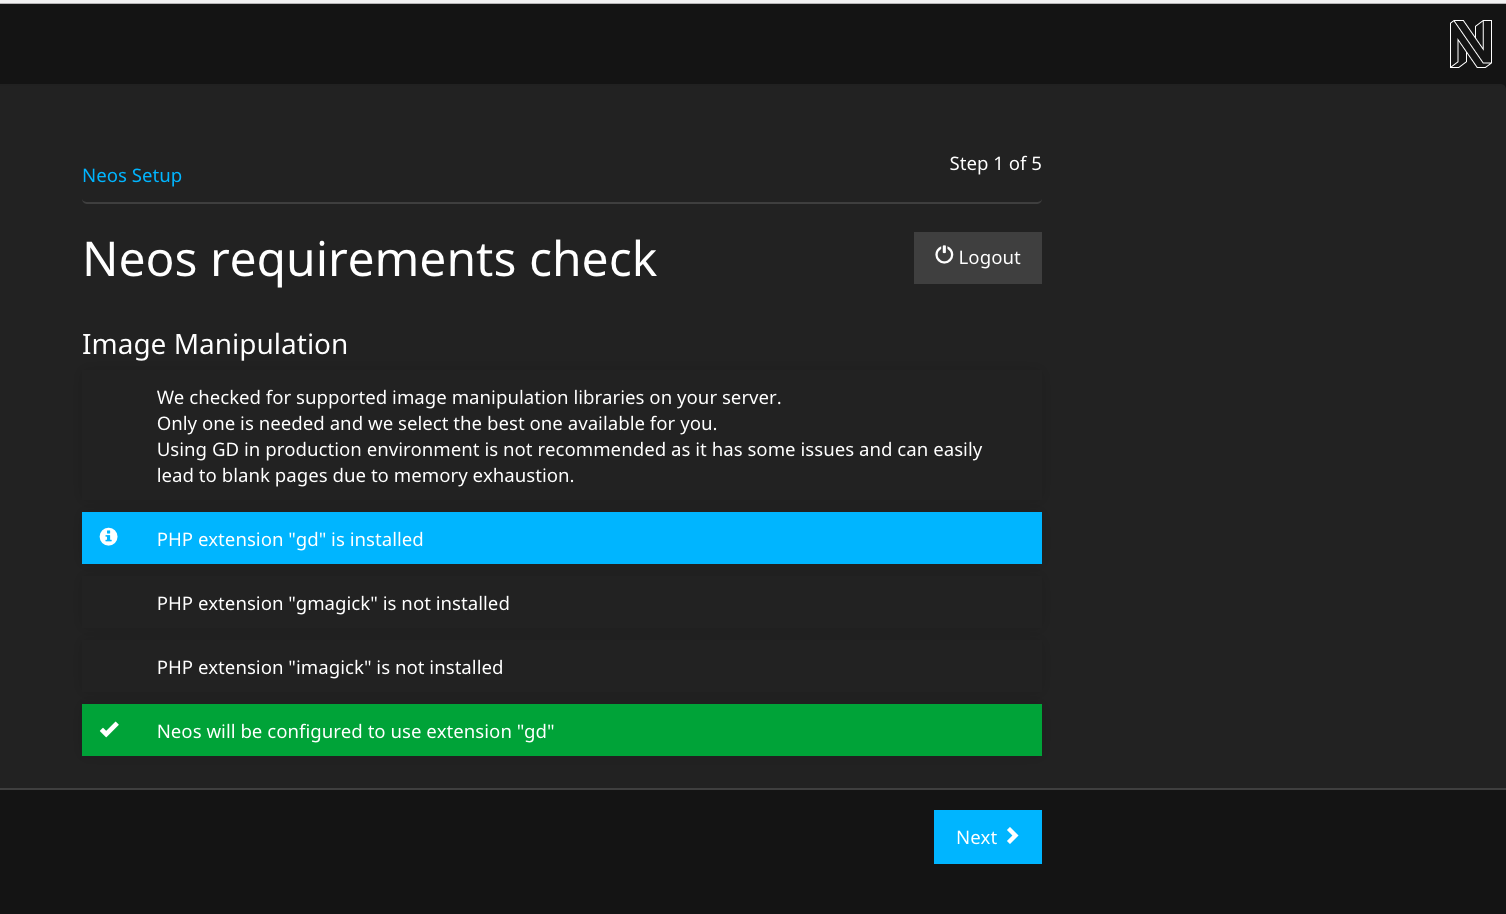
A check for the basic requirements of Flow and Neos will be run. If all is well, you will see a login screen. If a check failed, hints on solving the issue will be shown and you should fix what needs to be fixed. Then just reload the page, until all requirements are met.
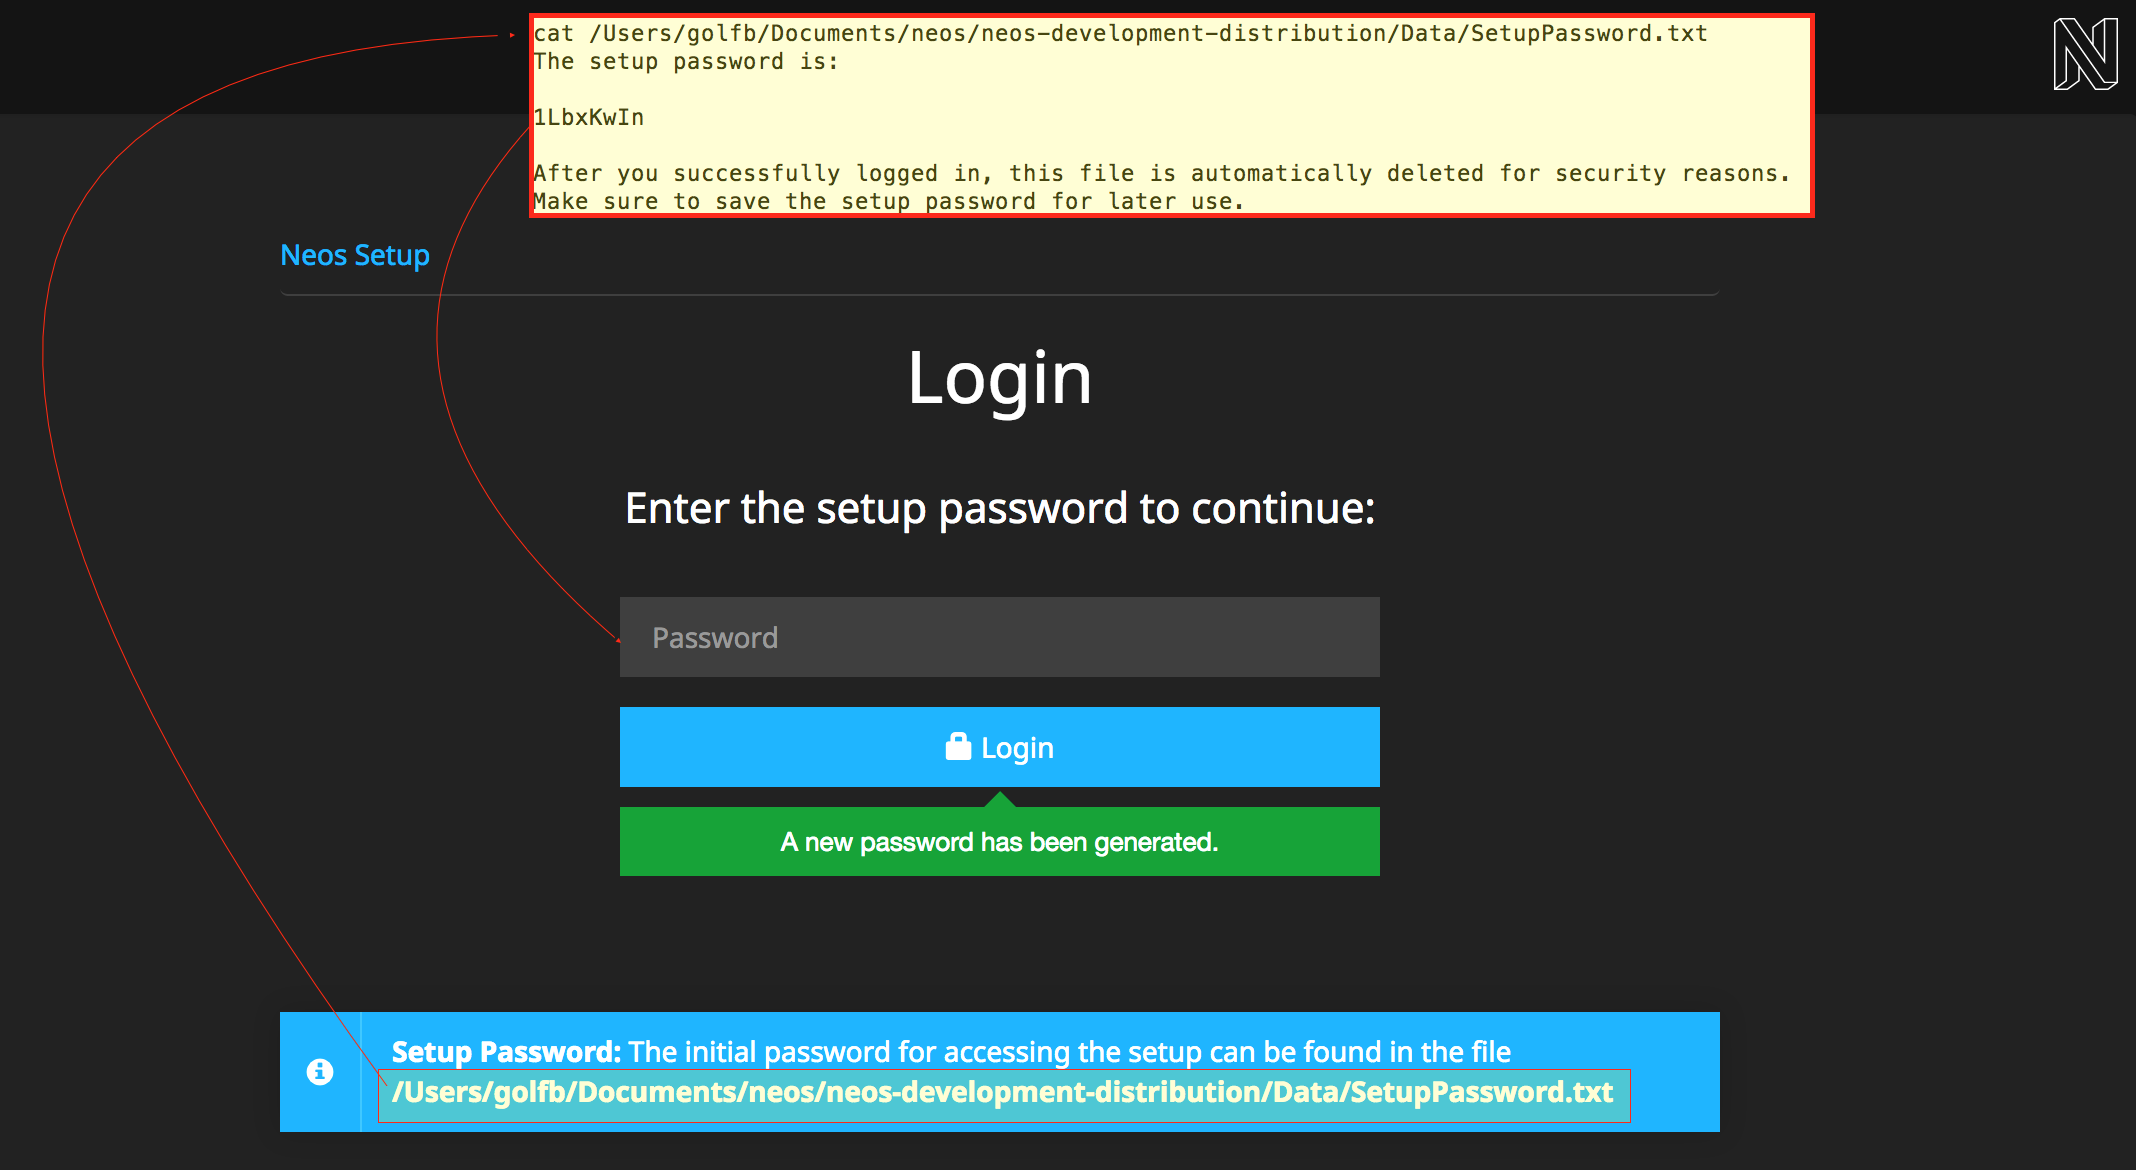
The login screen will tell you the location of a file with a generated password. Keep that password in some secure place, the generated file will be removed upon login! It is possible to have a new password rendered if you lost it, so don’t worry too much.
The NEOS requirements check checks, if you have installed an image manipulation software.
Fill in the database credentials in the first step. The selector box will be updated with accessible databases to choose from, or you can create a new one.
Tip
Configure your MySQL server to use the
utf8_unicode_cicollation by default if possible!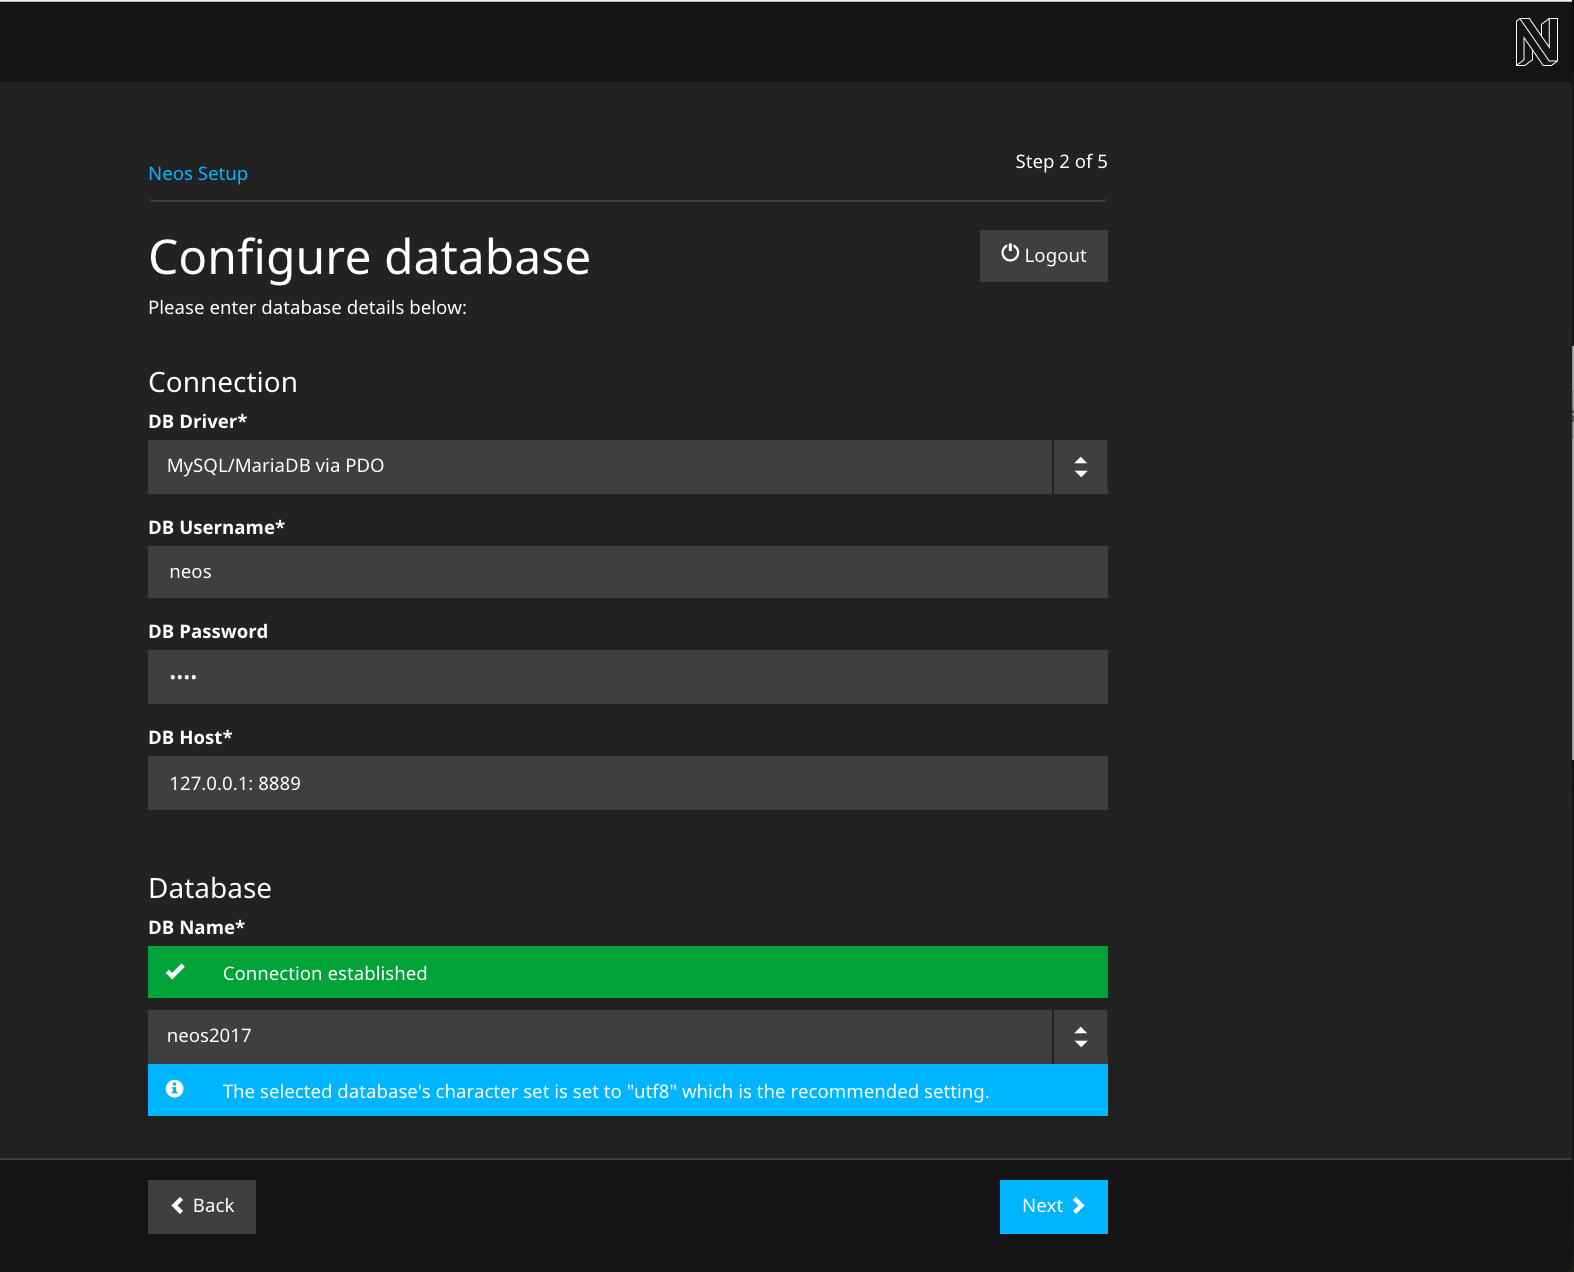
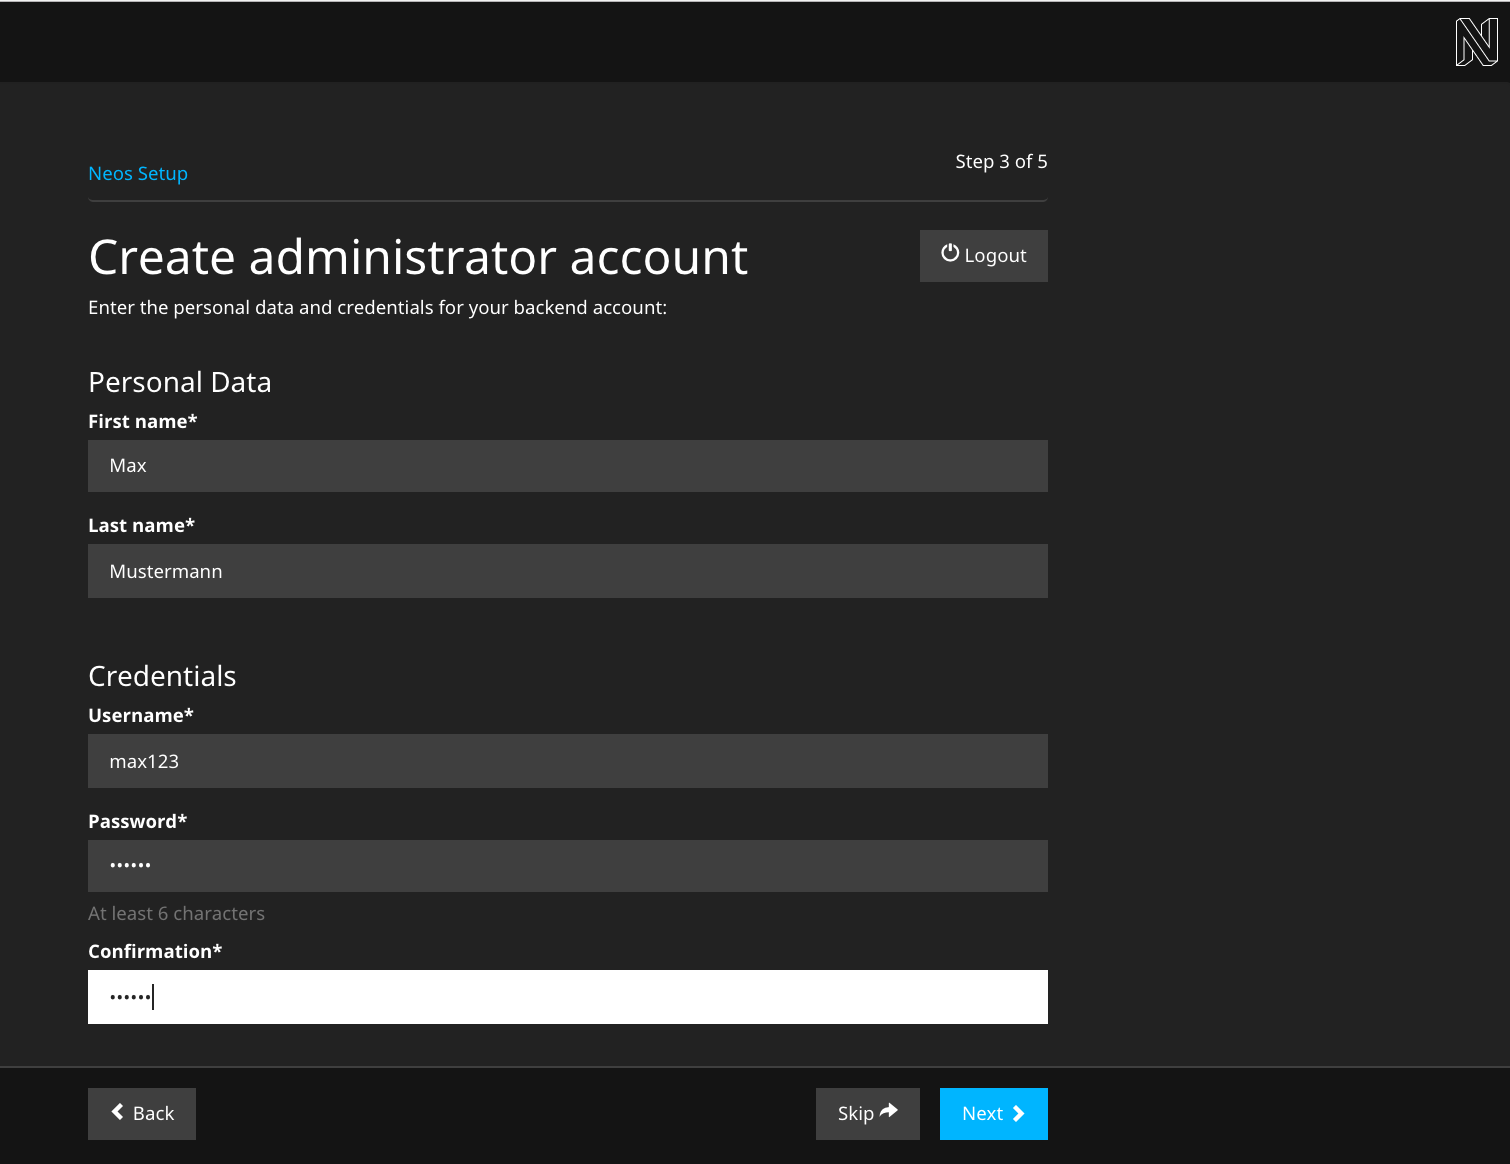
In the next step a user with administrator privileges for editing with Neos is created.
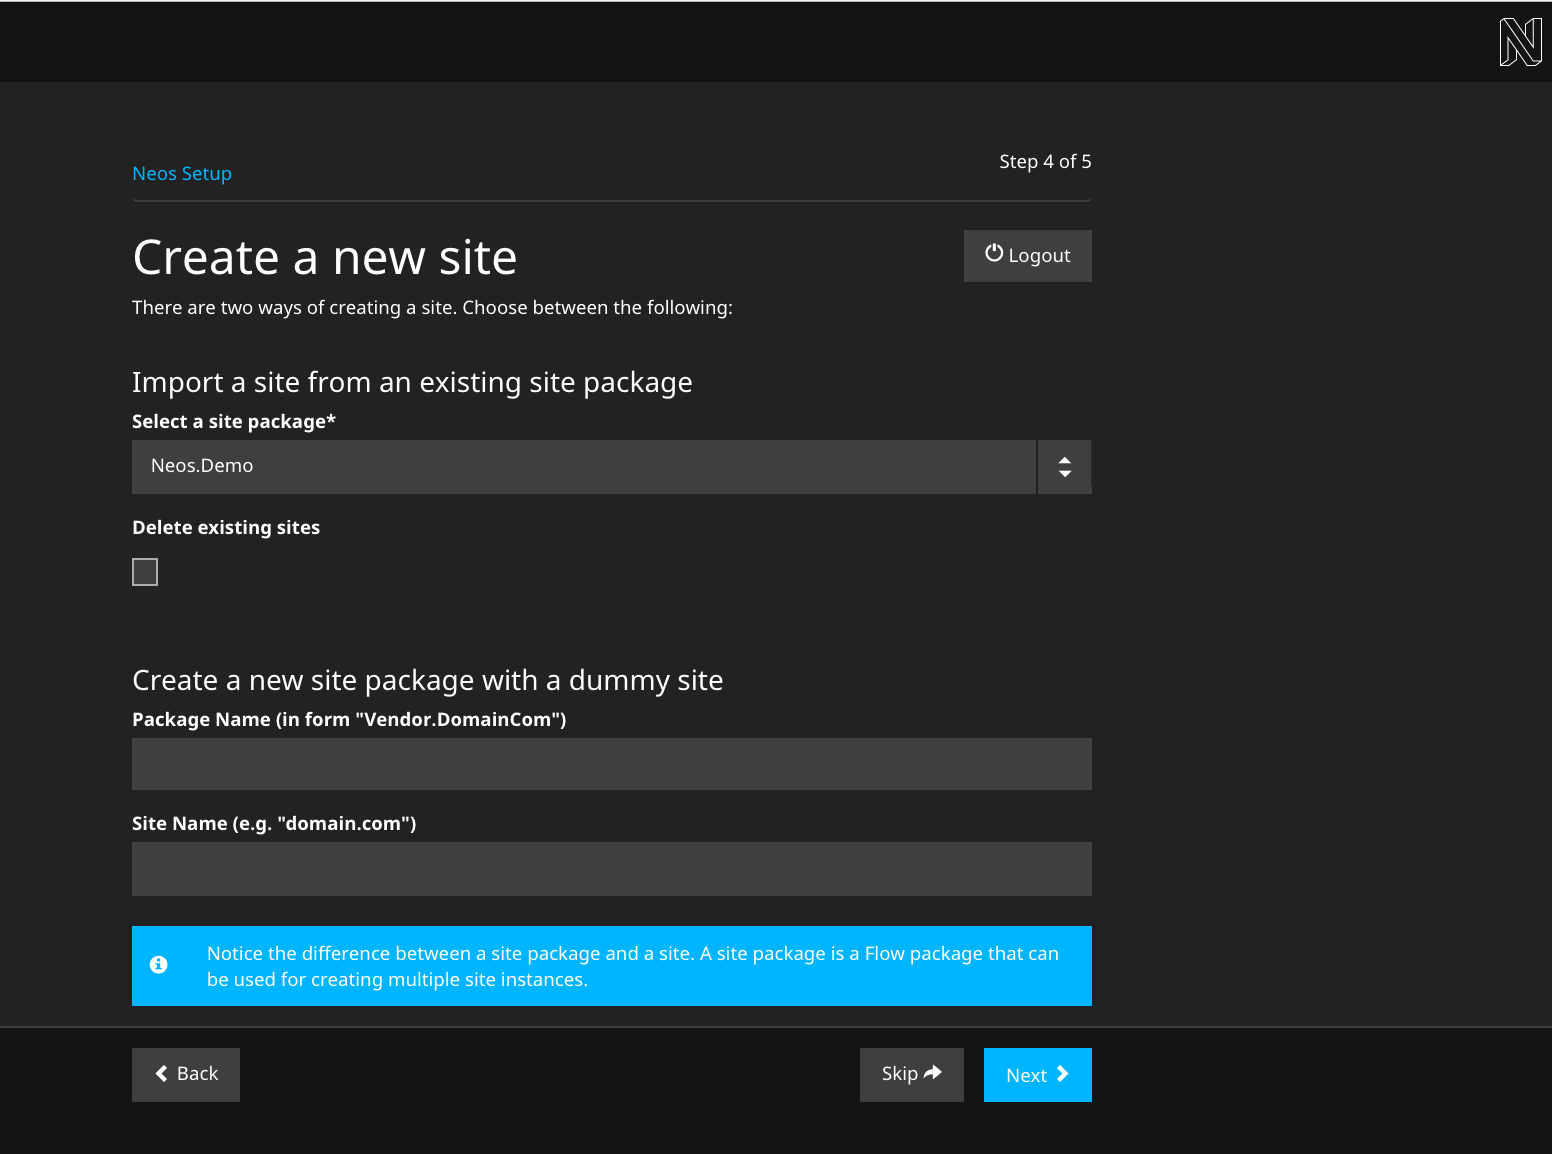
The following step allows you to import an existing site or kickstart a new site. To import the demo site, just make sure it is selected in the selector box and go to the next step.
To kickstart a new site, enter a package and site name in the form before going to the next step.
If you are new to Neos, we recommend to import the existing demo site so you can follow the next section giving you a basic tour of the user interface.
If all went well you’ll get a confirmation the setup is completed, and you can enter the frontend or backend of your Neos website.
Warning
If you install the Neos demo site and it is publicly accessible, make sure the “Try me” page in the page tree is not publicly accessible because it has a form allowing you to create backend editor accounts with rights to edit website content.)
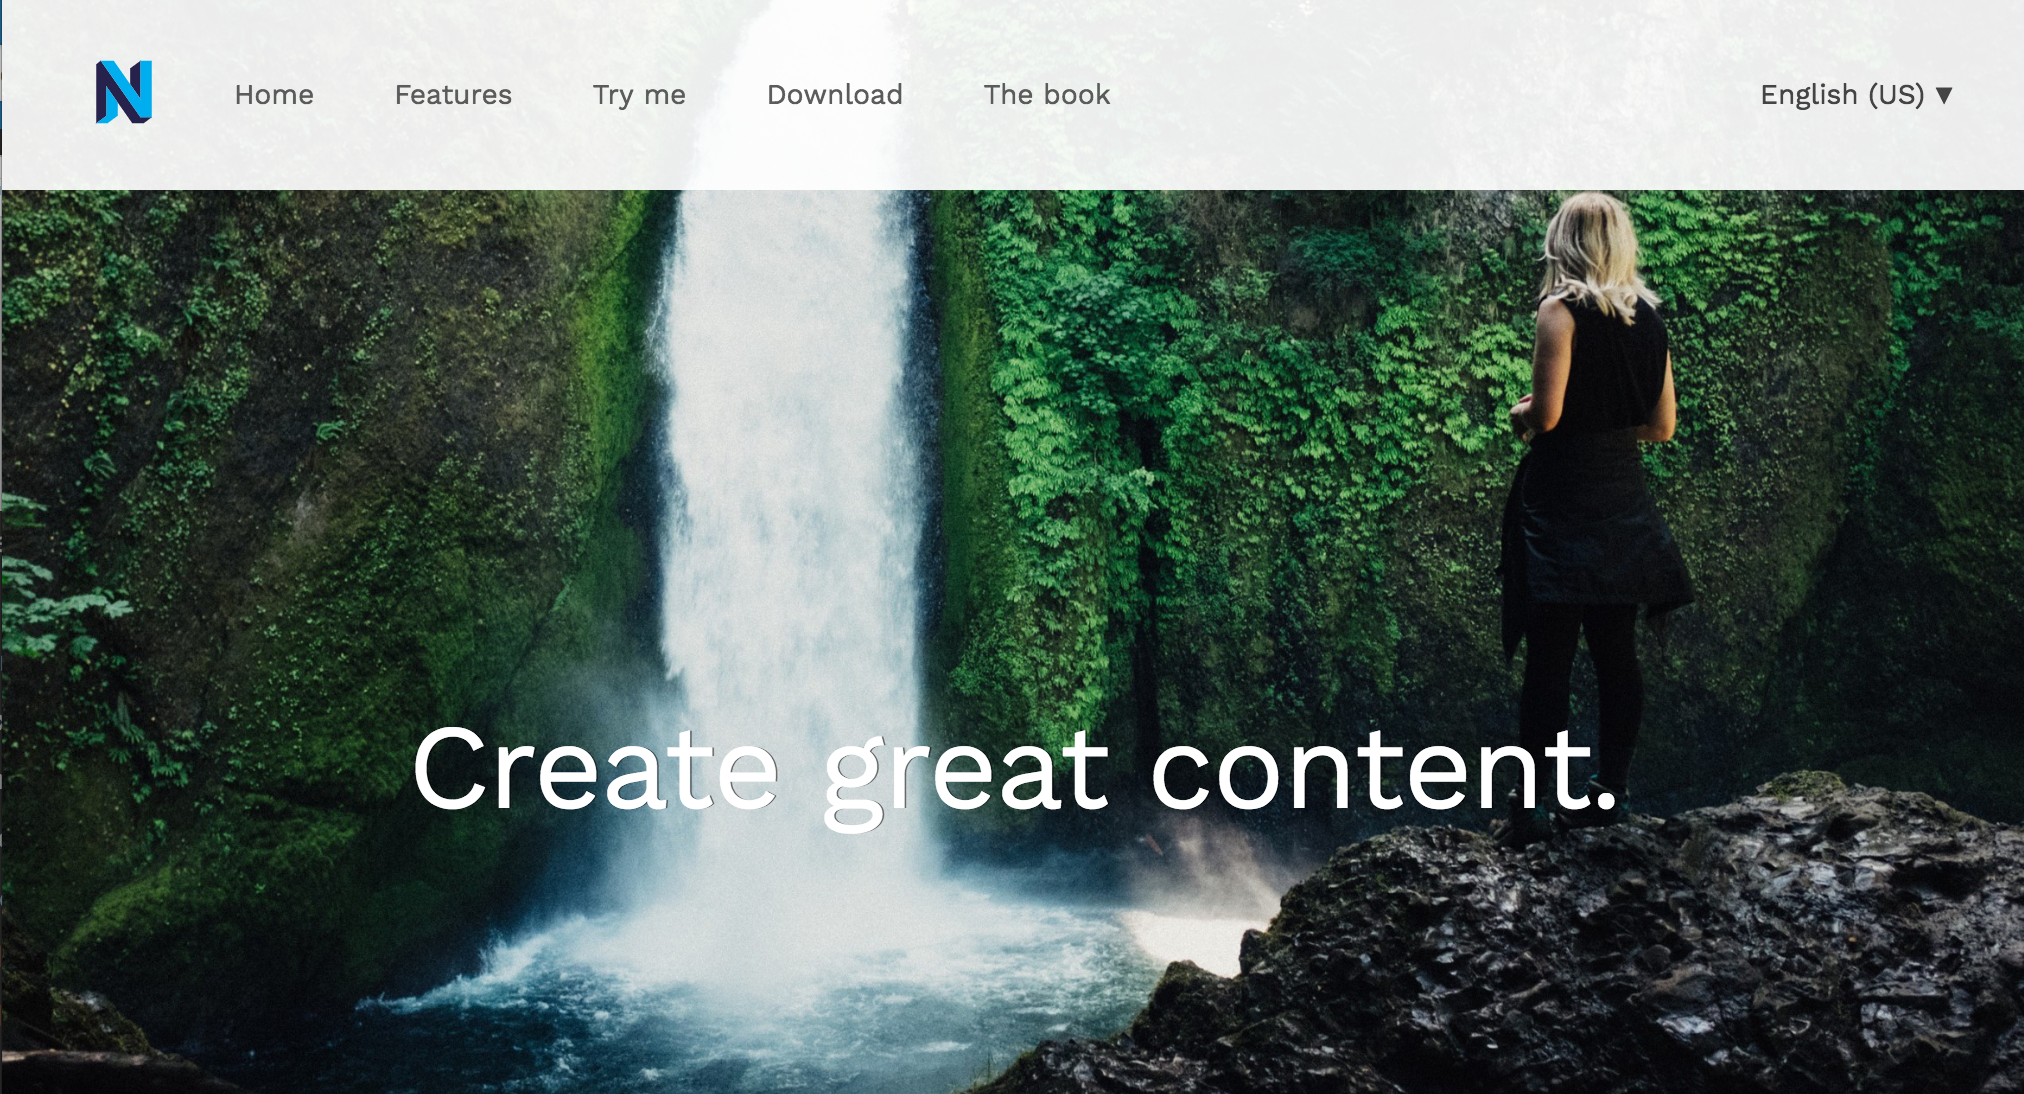
The Neos demo site start page